Not in one fell swoop sadly. However the time saved on producing a quite beautiful low poly game artifact was substantial indeed! I set out earlier to create a panel of buttons for the interior of an elevator. Seems simple enough but then you begin researching styles across Google Images and there’s just too many to choose! Oh what to do?? “Save me, Midjourney!”
/IMAGINE
By now most people have heard of Midjourney, that little AI rascal that’s threatening your distant cousin’s future art career. Well prepare for just a little more fear, kid. I have a year long subscription to this fun little toy and I decided to let it come up with some original designs for me. So I came up with the most descriptive little prompt I could:
A tall rectangular antique-looking brass elevator button panel. On this panel there are 5 rows. Each row contains a black shiny button on the left and a long white rectangular label on the right. On each label there is a word in black ink cursive-style handwriting.
– Greatest Midjourney Prompt Ever
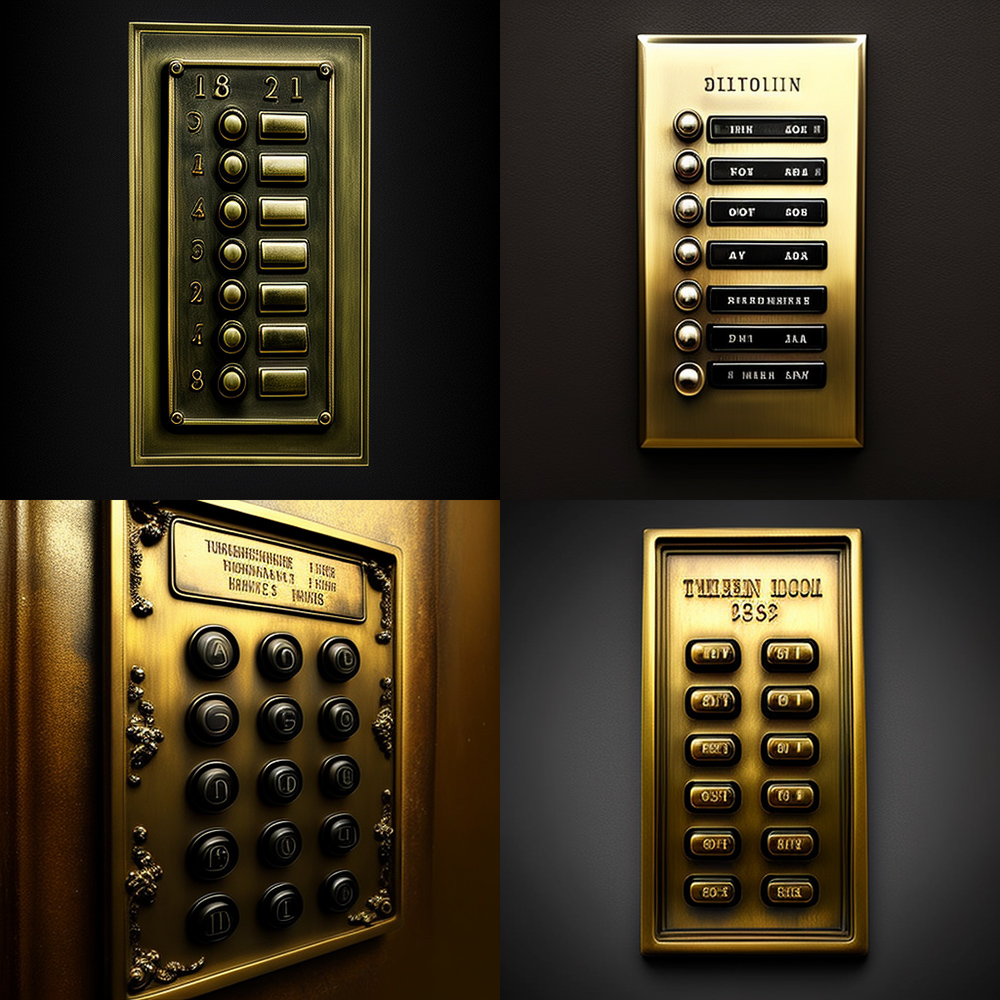
Wow! Simply gorgeous results. Midjourney never fails to impress me. My prompts worked quite well this time thankfully but as usual it failed miserably on the text. I was just hoping it could attempt to scribble some nonsense in cursive on labels. It’s always fun to see what “words” an AI dreams up.
Well #2 was almost exactly what I needed but I was REALLY feeling the feel of #1 so I instructed the bot to up-res it. Then I took it into Photoshop to clean it up, mostly using Content-Aware Fill and the Healing brush. I used Skew transforming to align the corners with some rulers. I then copied the buttons and labels to new layers, split and moved them around, filled in the missing middle bits, and cleaned up the edges as I merged it all back together to create the clean plate version you see here.
INSET, EXTRUDE, SCALE, REPEAT!
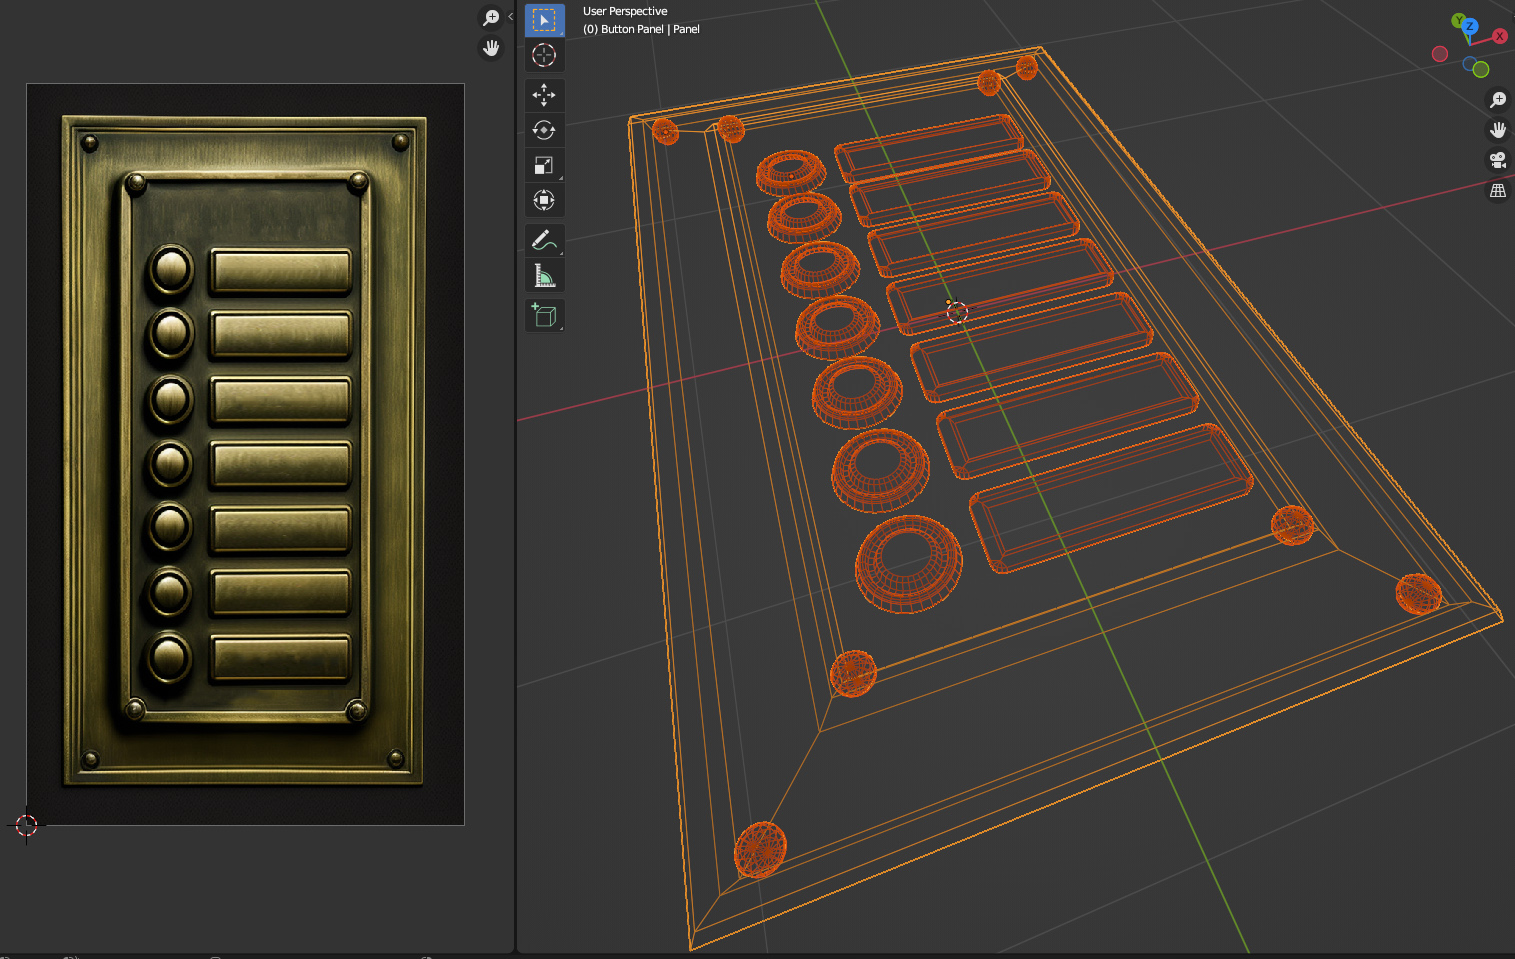
The next step was to import this image as a reference plane in Blender and begin modeling on top of it. I swapped into Orthographic camera mode, looking straight down, and began with a simple plane matching the edges of the brass plate. I then select the face, inset until I reach the inside lip, then extrude down, scale a bit to create a bevel effect, and repeat. Boom! There’s a frame!
I then added cylinders and did the same steps for the buttons, then once again for the labels using long cubes with beveled edges to round them out. Inset the face, extrude down, scale, bevel, rinse repeat. Then pepper on a few spheres for the rivets and voila! A fully fleshed out 3D version of an imaginary thing.
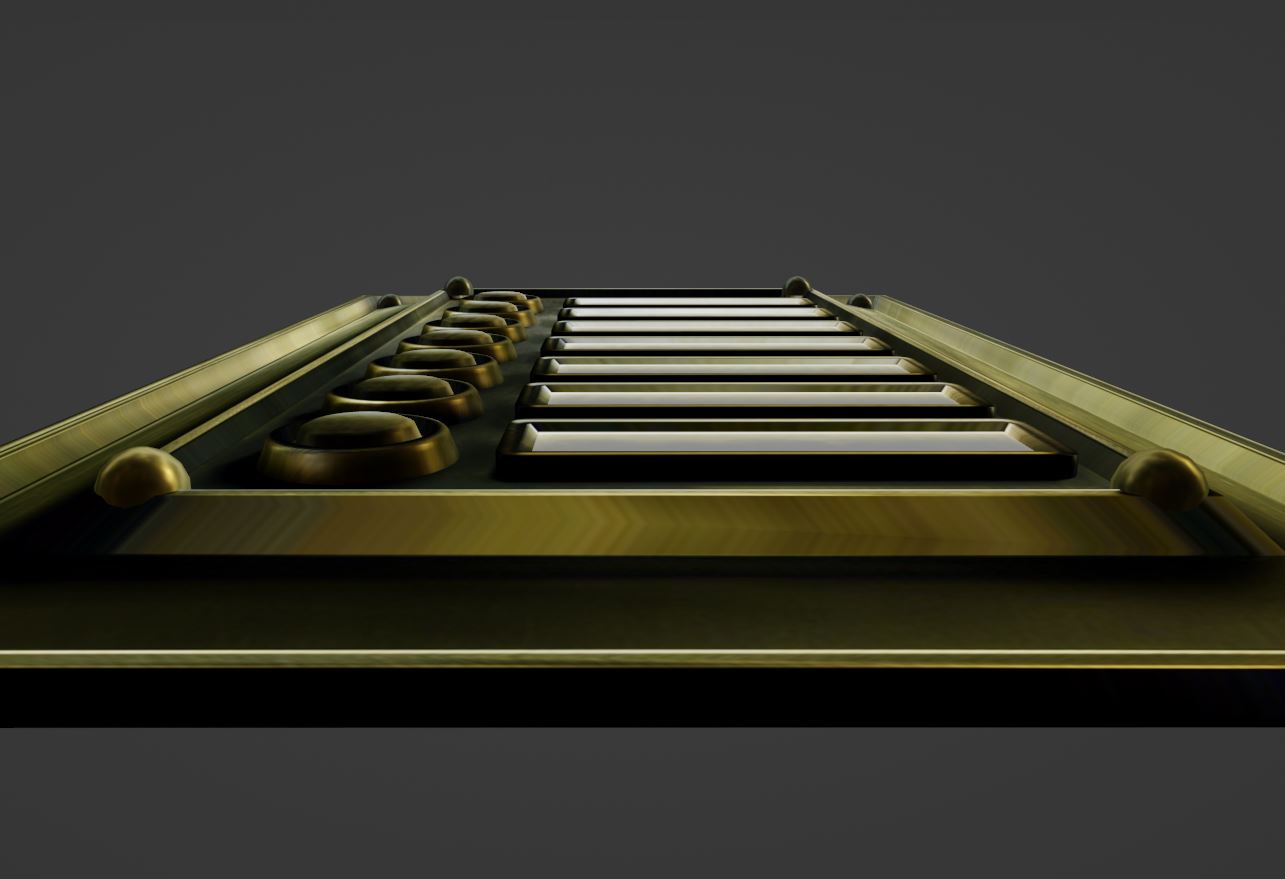
Sure maybe it’s not the greatest asset ever created but it’s pretty freaking great for its application in a low poly VR environment! So simple too!
IT TOOK… MAYBE 30 MINUTES?
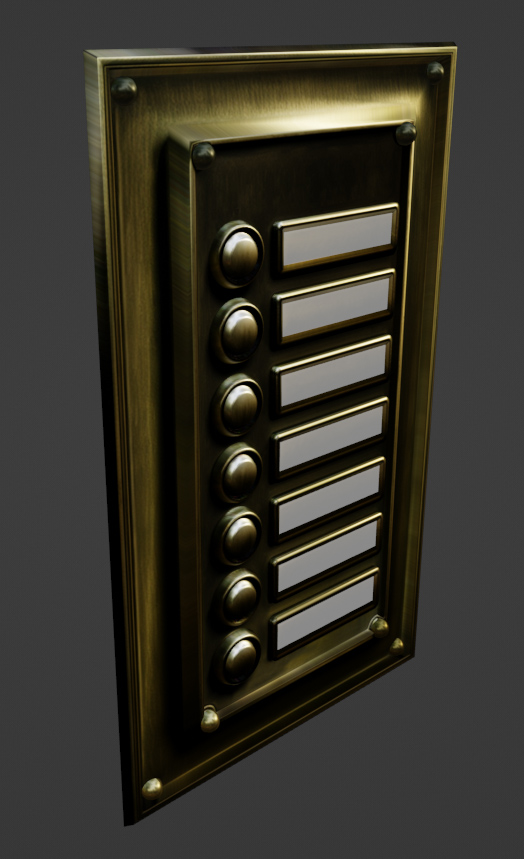
THANKS, MIDJOURNEY!
I definitely now have a new methodology in my toolkit for ideating on styles for modeling certain objects, and hey bonus if I’m able to use it as a texture base as well! Though this path doesn’t always lead to results, and depending on complexity it could get really hairy trying to make all the details work out, for simple projects like this Midjourney is a perfect tool for inspiring creativity and getting results quickly! I highly recommend you try this approach yourself and see what fun projects you can come up with.